Opening a campaign for lead gathering (web and phone)
- Entry into campaign management
- Clicking the “Add Campaign” button to create a new campaign.

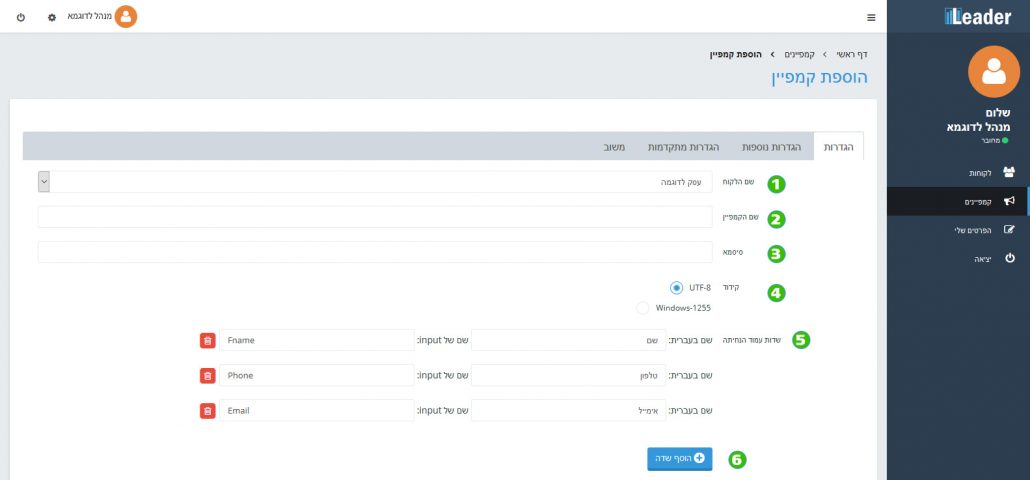
Fill out campaign details and data fields
- Client name – Appears if there are numerous clients under manager – please select the client you want to open the campaign for.
- Campaign name – Campaign ID name (advertisement activity / project)
- Password– Choose a password that is not easy to guess. The password will use to transmit campaign data.
- Encoding the landing page – Most will be utf-8 and there should be no need to change this. For older websites, there may be a need to mark windows-1255 Encoding.
- Landing page fields -This is the form data you want to receive from the landing page or site. On one side, the name appears in Text for display and on the other side fill in the data that the form sends. Default fields must be saved unchanged (if you would like to change them, please contact us).
- Add field button – This allows you to add unlimited custom fields according to the data you would like to receive from the site / landing page.

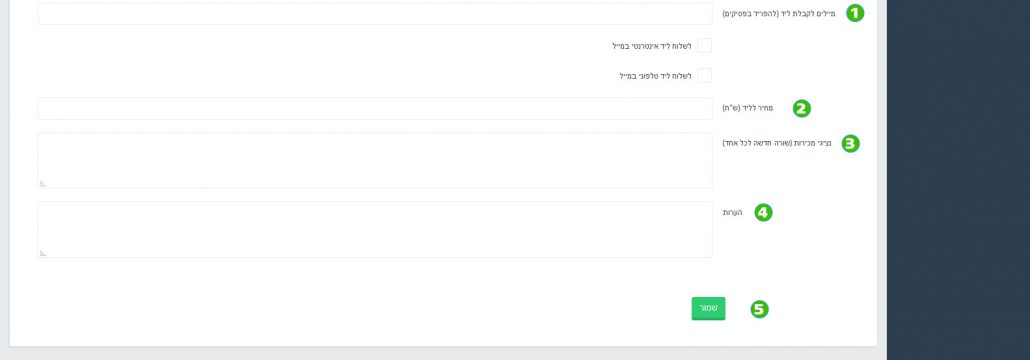
Continue filling out campaign details.
- Emails for lead acquisition – Whenever a lead is generated from a form or phone call, you can receive a detailed email alert. It is possible to receive alerts about all forms and calls, a specific alert, or no alerts by checking the information you want.
- Price per lead– You can mark a price per lead when each one is purchased at a fixed price (Dynamic CPL calculation according to your budget can be configured in the More Settings tab)
- Sales representatives – The representatives’ names will appear on the leads screen to indicate the relevant point of contact.
- Comments– Free text window for different comments.
- Saving settings – Click Save and the campaign is good to go!
